Android Dialog Window and DialogFragment
Android Dialog Fragment Dialog differenceDialog Window
A dialog is a small window that prompts the user to make a decision or enter additional information. A dialog does not fill the screen and is normally used for modal events that require users to take an action before they can proceed.In this case, you can override the onCreateDialog() protected method defined in the base Activity class to display a dialog window.
Types of Dialog
Dialog: Base class for all dialogs. It is usually used to inform user and is the simplest form of a dialog.
• AlertDialog: This dialog contains a number of buttons as shown in figure. It is used to get user confirmation on some specific operations like delete a file.
• CharacterPickerDialog: It is used to pick an accented character that is associated with base character.
• DatePickerDialog: It contains DatePicker control. It is used to collect data from user.
• ProgressDialog: It contains a ProgressBar control. It is used to update the status of an operation. For example, file transfer is in progress.
• TimePickerDialog: It contains a TimePicker as shown in figure.
The Demonstrative project portrays the use of Dialog window (now deprecated) to select a given choice of items
1.Create Android project with details as listed in table below
Property name | Property value |
Project name | SRM_DialogTutorial |
Package name | in.ac.srmuniv.dialogwindowtutorial |
Activity name | MainActivity |
Layout xml name | activity_main |
2.Copy the code to the file activity_main.xml in res/layout folder
<?xml version="1.0"encoding="utf-8"?>
<LinearLayout xmlns:android="http://schemas.android.com/apk/res/android"
android:layout_width="fill_parent"
android:layout_height="fill_parent"
android:orientation="vertical" >
<TextView
android:id="@+id/textView1"
android:layout_width="wrap_content"
android:layout_height="wrap_content"
android:layout_gravity="center_horizontal"
android:paddingBottom="10dp"
android:paddingTop="10dp"
android:text="SRM Travels "
android:textSize="20sp" >
</TextView>
<TextView
android:id="@+id/textView2"
android:layout_width="wrap_content"
android:layout_height="wrap_content"
android:layout_gravity="center_horizontal"
android:paddingBottom="25dp"
android:paddingTop="5dp"
android:text="Travel Plan "
android:textSize="20sp" >
</TextView>
<LinearLayout
android:layout_width="match_parent"
android:layout_height="wrap_content" >
<EditText
android:id="@+id/txtDestination"
android:layout_width="wrap_content"
android:layout_height="wrap_content"
android:layout_weight="1"
android:editable="false" >
<requestFocus>
</requestFocus>
</EditText>
<Button
android:id="@+id/btnDestination"
android:layout_width="100dp"
android:layout_height="wrap_content"
android:layout_weight="0"
android:text="Destination Plan" >
</Button>
</LinearLayout>
<LinearLayout
android:layout_width="match_parent"
android:layout_height="wrap_content" >
<EditText
android:id="@+id/txtDate"
android:layout_width="wrap_content"
android:layout_height="wrap_content"
android:layout_weight="1"
android:editable="false" >
<requestFocus>
</requestFocus>
</EditText>
<Button
android:id="@+id/btnCalendar"
android:layout_width="100dp"
android:layout_height="wrap_content"
android:layout_weight="0"
android:text="Date Picker" >
</Button>
</LinearLayout>
<LinearLayout
android:layout_width="match_parent"
android:layout_height="wrap_content" >
<EditText
android:id="@+id/txtTime"
android:layout_width="wrap_content"
android:layout_height="wrap_content"
android:layout_weight="1"
android:editable="false" >
<requestFocus>
</requestFocus>
</EditText>
<Button
android:id="@+id/btnTimePicker"
android:layout_width="100dp"
android:layout_height="wrap_content"
android:layout_weight="0"
android:text="Time Picker" >
</Button>
</LinearLayout>
<LinearLayout
android:layout_width="match_parent"
android:layout_height="wrap_content" >
<Button
android:id="@+id/btnSubmit"
android:layout_width="100dp"
android:layout_height="wrap_content"
android:layout_weight="1"
android:text="Submit" />
<Button
android:id="@+id/btnCancel"
android:layout_width="100dp"
android:layout_height="wrap_content"
android:layout_weight="1"
android:text="Cancel" />
</LinearLayout>
</LinearLayout>
3.Copy the code to the file strings.xml in res/values folder
<?xml version="1.0"encoding="utf-8"?>
<resources>
<string name="app_name">DialogWindow</string>
<string name="action_settings">Settings</string>
<string name="show_dialog">Show Dialog</string>
<string name="dialog_message">Select Destination place</string>
<string name="dialog_title">SRM Travels</string>
<string name="dialog_positive_text">Yes</string>
<string name="dialog_positive_toast_message">You clicked Yes!</string>
<string name="dialog_negative_text">No</string>
<string name="dialog_negative_toast_message">You clicked No (…, …) ?</string>
</resources>
4.Copy the code in SRM_DialogActivity.java Activity
packagein.ac.srmuniv.dialogwindowtutorial;
import java.util.Calendar;
importandroid.app.Activity;
importandroid.app.AlertDialog;
importandroid.app.DatePickerDialog;
import android.app.Dialog;
importandroid.app.TimePickerDialog.OnTimeSetListener;
importandroid.content.DialogInterface;
importandroid.app.TimePickerDialog;
importandroid.widget.TimePicker;
import android.os.Bundle;
import android.view.View;
importandroid.view.View.OnClickListener;
importandroid.widget.Button;
import android.widget.DatePicker;
importandroid.widget.EditText;
importandroid.widget.Toast;
public class MainActivity extends Activity implements OnClickListener {
static final int ALERT_DIALOG_ID = 0;
static final int TIME_DIALOG_ID = 1;
static final int DATE_DIALOG_ID = 2;
EditText time, date, destination;
Button buttonTime;
Button buttonDate;
Button buttonPerson;
Button buttonSubmit;
Button buttonCancel;
CharSequence[] items = { "TIRUNELVELI", "BANGLORE", "HYDERABAD", "MADURAI" };
int itemsChecked;// = new boolean [items.length];
/** Called when the activity is first created. */
@Override
public void onCreate(Bundle savedInstanceState) {
super.onCreate(savedInstanceState);
setContentView(R.layout.activity_main);
buttonTime = (Button) findViewById(R.id.btnTimePicker);
buttonDate = (Button) findViewById(R.id.btnCalendar);
buttonDest = (Button) findViewById(R.id.btnDestination);
buttonSubmit = (Button) findViewById(R.id.btnSubmit);
buttonCancel = (Button) findViewById(R.id.btnCancel);
buttonTime.setOnClickListener(this);
buttonDate.setOnClickListener(this);
buttonPerson.setOnClickListener(this);
buttonSubmit.setOnClickListener(this);
buttonCancel.setOnClickListener(this);
time = (EditText) findViewById(R.id.txtTime);
date = (EditText) findViewById(R.id.txtDate);
destination = (EditText) findViewById(R.id.txtDestination);
}
@Override
protected Dialog onCreateDialog(int id) {
int hour;
int minute;
switch (id) {
case ALERT_DIALOG_ID:
return new AlertDialog.Builder(this)
.setIcon(R.drawable.ic_launcher)
.setTitle(R.string.dialog_title)
.setPositiveButton(R.string.dialog_positive_text,
newDialogInterface.OnClickListener() {
public voidonClick(DialogInterface dialog,
int whichButton) {
Toast.makeText(
getBaseContext(),
R.string.dialog_positive_toast_message,
Toast.LENGTH_SHORT).show();
}
})
.setNegativeButton(R.string.dialog_negative_text,
new DialogInterface.OnClickListener() {
public voidonClick(DialogInterface dialog,
int whichButton) {
Toast.makeText(
getBaseContext(),
R.string.dialog_negative_toast_message,
Toast.LENGTH_SHORT).show();
}
})
.setSingleChoiceItems(items, itemsChecked,
newDialogInterface.OnClickListener() {
@Override
public voidonClick(DialogInterface arg0,
int which) {
destination.setText(items[which]);
}
}).create();
case TIME_DIALOG_ID:
final Calendar c = Calendar.getInstance();
// Current Hour
hour = c.get(Calendar.HOUR_OF_DAY);
// Current Minute
minute = c.get(Calendar.MINUTE);
TimePickerDialog tpd = new TimePickerDialog(this,
new OnTimeSetListener() {
@Override
public void onTimeSet(TimePicker view, int hourOfDay,
int minutes) {
time.setText("Hrs " + hourOfDay + ":" + minutes
+ " mins");
}
}, hour, minute, false);
tpd.setIcon(R.drawable.ic_launcher);
tpd.show();
break;
case DATE_DIALOG_ID:
// Process to get Current Date
final Calendar c1 = Calendar.getInstance();
int mYear = c1.get(Calendar.YEAR);
int mMonth = c1.get(Calendar.MONTH);
int mDay = c1.get(Calendar.DAY_OF_MONTH);
// Launch Date Picker Dialog
DatePickerDialog dpd = new DatePickerDialog(this,
newDatePickerDialog.OnDateSetListener() {
@Override
public void onDateSet(DatePicker view, int year,
int monthOfYear, int dayOfMonth) {
// Display Selected date in textbox
date.setText(dayOfMonth + "-" + (monthOfYear + 1)
+ "-" + year);
}
}, mYear, mMonth, mDay);
dpd.show();
}
return null;
}
@Override
public void onClick(View v) {
if (v == buttonDest)
else if (v == buttonTime)
else if (v == buttonDate)
else if (v == buttonSubmit) {
Toast.makeText(
getBaseContext(),
"Successfully submited\n Destination Place"
+ destination.getText().toString()
+ "\n Date of travel :" + date.getText().toString()
+ "\nTime :"+ time.getText().toString(),
Toast.LENGTH_SHORT).show();
} else {
destination.setText("");
time.setText("");
date.setText("");
}
}
}
5.No need to modify Androidmanifest.xml
6.Run the application in the emulator


Figure 1 Shows Activity displaying 'travel plan' form Figure 2 Shows Alert Dialog Window floating over the Activity when button is clicked.


Figure 3 Shows DatePicker Dialog and Figure 4 Shows Time Picker Dialog

C0DE EXPLANATION
The Activity which present 'travel plan' form. Click of the respective buttons to display the respective dialog .Appropriate values selected through the dialog will set the EditText in the Activity to display the selected values.One has to override the onCreateDialog() method in the Activity class to create appropriate dialog based on the id passed as arguments.This method is called when you call the showDialog() method:
public void onClick(View v) {
showDialog(0);
}
@Override
protected Dialog onCreateDialog(int id) {
//...
}
The onCreateDialog() method is for creating dialogs that are managed by the Activity. When you call the showDialog() method, this callback will be invoked. The showDialog() method accepts an integer argument identifying a particular dialog to display.
To create a AlertDialog, you use the AlertDialog class’s Builder constructor. You set the various properties, such as icon, title,and buttons, as well as checkboxes/radio buttons for choice of items.
The preceding code sets two buttons: OK and Cancel, using the setPositiveButton() and setNegativeButton() methods, respectively. You also set a list of multi choice checkboxes for users to choose via the setMultiChoiceItems() method. For the setSingleChoiceItems() method, you passed in two arrays: one for the list of items to display and another to contain the value of each item to indicate if they are checked. When each item is checked, you use the Toast class to display a message (see Figure 2).
Similarly TimePickerDialog and DatePickerDialog are selected to fetch date and time
To create a AlertDialog, you use the AlertDialog class’s Builder constructor. You set the various properties, such as icon, title,and buttons, as well as checkboxes/radio buttons for choice of items.
switch (id) {
case ALERT_DIALOG_ID:
return new AlertDialog.Builder(this)
.setIcon(R.drawable.ic_launcher)
.setTitle(R.string.dialog_title)
.setPositiveButton(R.string.dialog_positive_text,
newDialogInterface.OnClickListener() {
public voidonClick(DialogInterface dialog,
int whichButton) {
Toast.makeText(
getBaseContext(),
R.string.dialog_positive_toast_message,
Toast.LENGTH_SHORT).show();
}
})
.setNegativeButton(R.string.dialog_negative_text,
newDialogInterface.OnClickListener() {
public voidonClick(DialogInterface dialog,
int whichButton) {
Toast.makeText(
getBaseContext(),
R.string.dialog_negative_toast_message,
Toast.LENGTH_SHORT).show();
}
})
.setSingleChoiceItems(items, itemsChecked,
newDialogInterface.OnClickListener() {
@Override
public voidonClick(DialogInterface arg0,
int which) {
destination.setText(items[which]);
}
}).create();
Similarly TimePickerDialog and DatePickerDialog are selected to fetch date and time
The Context Object
In Android, you often encounter the Context class and its instances. Instances of the Context class are often used to provide references to your application. For example,in the following code snippet, the fi rst parameter of the Toast class takes in a Context object:.setPositiveButton("OK",
newDialogInterface.OnClickListener() {
public voidonClick(DialogInterface dialog, int whichButton)
{
Toast.makeText(getBaseContext(),
"OK clicked!, Toast.LENGTH_SHORT).show();
}
}
However, because the Toast() class is not used directly in the Activity (it is used within the AlertDialog class), you need to return an instance of the Context class by using the getBaseContext() method.You also encounter the Context class when creating a view dynamically in an activity. For example, you may want to dynamically create a TextView from code.To do so, you instantiate the TextView class, like this:
TextView tv = new TextView(this);
The constructor for the TextView class takes a Context object; and because the Activity class is a subclass of Context, you can use the this keyword to represent the Context object.
TextView tv = new TextView(this);
The constructor for the TextView class takes a Context object; and because the Activity class is a subclass of Context, you can use the this keyword to represent the Context object.
Dialog Fragments
A dialog box is one which pops up and floats over the UI (that is, partially obscuring the current UI) in a transparent manner prompting the user for input needed by the program -- e.g., date, time. Since the introduction of API level 13 the showDialog method from Activity is deprecated. Invoking a dialog elsewhere in code is not advisable since you will have to manage the the dialog yourself (e.g. orientation change).
A fragment that displays a dialog window, floating on top of its activity's window. This fragment contains a Dialog object, which it displays as appropriate based on the fragment's state. Control of the dialog (deciding when to show, hide, dismiss it) should be done through the API here, not with direct calls on the dialog.Implementations should override this class and implement onCreateView(LayoutInflater, ViewGroup, Bundle) to supply the content of the dialog. Alternatively, they can override onCreateDialog(Bundle) to create an entirely custom dialog, such as an AlertDialog, with its own content.
Lifecycle
The dialogs are separate entities they have their own window, receiving their own input events, and often deciding on their own when to disappear (by receiving a back key event or the user clicking on a button).
DialogFragment maintains lifecycle instead of the Dialog. DialogFragment monitors for dismiss events from the dialog and takes care of removing its own state when they happen. You have to use show(FragmentManager, String) or show(FragmentTransaction, String) to add an instance of DialogFragment to your UI, as these keep track of how DialogFragment should remove itself when the dialog is dismissed.
Alert Dialog
Instead of (or in addition to) implementing onCreateView(LayoutInflater, ViewGroup, Bundle) in fragments,you can generate the view hierarchy inside of a dialog, by implementing onCreateDialog(Bundle) to create your own custom Dialog object.
A DialogFragment can still optionally be used as a normal fragment, if desired. This is useful if you have a fragment that in some cases should be shown as a dialog and others embedded in a larger UI. This behavior will normally be automatically selected for you based on how you are using the fragment, but can be customized with setShowsDialog(boolean).
The Demonstrative project similar to previous project SRM_DialogWindow portrays the use of DialogFragments to select a given choice of items.
1.Create Android project with details as listed in the table below.
Property name | Property value |
Project name | SRM_DialogFragmentTutorial |
Package name | in.ac.srmuniv.dialogfragmenttutorial |
Activity name | MainActivity |
Layout xml name | activity_main |
2.Copy the code to the file activity_main.xml in res/layout folder
<?xml version="1.0"encoding="utf-8"?>
<LinearLayout xmlns:android="http://schemas.android.com/apk/res/android"
android:layout_width="fill_parent"
android:layout_height="fill_parent"
android:orientation="vertical" >
<TextView
android:id="@+id/textView1"
android:layout_width="wrap_content"
android:layout_height="wrap_content"
android:layout_gravity="center_horizontal"
android:paddingBottom="10dp"
android:paddingTop="10dp"
android:text="SRM Travels "
android:textSize="20sp" >
</TextView>
<TextView
android:id="@+id/textView2"
android:layout_width="wrap_content"
android:layout_height="wrap_content"
android:layout_gravity="center_horizontal"
android:paddingBottom="25dp"
android:paddingTop="5dp"
android:text="Travel Plan "
android:textSize="20sp" >
</TextView>
<LinearLayout
android:layout_width="match_parent"
android:layout_height="wrap_content" >
<EditText
android:id="@+id/txtDestination"
android:layout_width="wrap_content"
android:layout_height="wrap_content"
android:layout_weight="1"
android:editable="false" >
<requestFocus>
</requestFocus>
</EditText>
<Button
android:id="@+id/btnDestination"
android:layout_width="100dp"
android:layout_height="wrap_content"
android:layout_weight="0"
android:text="Destination Plan" >
</Button>
</LinearLayout>
<LinearLayout
android:layout_width="match_parent"
android:layout_height="wrap_content" >
<EditText
android:id="@+id/txtDate"
android:layout_width="wrap_content"
android:layout_height="wrap_content"
android:layout_weight="1"
android:editable="false" >
<requestFocus>
</requestFocus>
</EditText>
<Button
android:id="@+id/btnCalendar"
android:layout_width="100dp"
android:layout_height="wrap_content"
android:layout_weight="0"
android:text="Date Picker" >
</Button>
</LinearLayout>
<LinearLayout
android:layout_width="match_parent"
android:layout_height="wrap_content" >
<EditText
android:id="@+id/txtTime"
android:layout_width="wrap_content"
android:layout_height="wrap_content"
android:layout_weight="1"
android:editable="false" >
<requestFocus>
</requestFocus>
</EditText>
<Button
android:id="@+id/btnTimePicker"
android:layout_width="100dp"
android:layout_height="wrap_content"
android:layout_weight="0"
android:text="Time Picker" >
</Button>
</LinearLayout>
<LinearLayout
android:layout_width="match_parent"
android:layout_height="wrap_content" >
<Button
android:id="@+id/btnSubmit"
android:layout_width="100dp"
android:layout_height="wrap_content"
android:layout_weight="1"
android:text="Submit" />
<Button
android:id="@+id/btnCancel"
android:layout_width="100dp"
android:layout_height="wrap_content"
android:layout_weight="1"
android:text="Cancel" />
</LinearLayout>
</LinearLayout>
3.Copy the code to the file choice_dialog_fragment.xml in res/layout folder
<?xml version="1.0"encoding="utf-8"?>
<LinearLayout xmlns:android="http://schemas.android.com/apk/res/android"
android:layout_width="match_parent"
android:layout_height="match_parent"
android:orientation="vertical" >
<TextView
android:id="@+id/textView1"
android:layout_width="wrap_content"
android:layout_height="wrap_content"
android:padding="10dp"
android:text="@string/dialog_message" />
</LinearLayout>
4.Copy the code to the file strings.xml in res/values folder
4.Copy the code to the file strings.xml in res/values folder
<?xml version="1.0"encoding="utf-8"?>
<resources>
<string name="app_name">DialogFragments</string>
<string name="action_settings">Settings</string>
<string name="show_dialog">Show Dialog</string>
<string name="dialog_message">Select any one of the Destination Place</string>
<string name="dialog_title">SRM Travels</string>
<string name="dialog_positive_text">Yes</string>
<string name="dialog_positive_toast_message">You clicked Yes!</string>
<string name="dialog_negative_text">No</string>
<string name="dialog_negative_toast_message">You clicked No (…, …) ?</string>
</resources>
5.Copy the code in MainActivity.java. Activity.
packagein.ac.srmuniv.dialogfragmenttutorial;
importandroid.app.Activity;
importandroid.app.AlertDialog;
import android.app.Dialog;
importandroid.app.DialogFragment;
importandroid.content.DialogInterface;
import android.os.Bundle;
import android.view.View;
importandroid.view.View.OnClickListener;
importandroid.widget.Button;
importandroid.widget.EditText;
importandroid.widget.TextView;
importandroid.widget.Toast;
public class MainActivity extends Activity {
static CharSequence[] items = { "TIRUNELVELI", "BANGLORE", "HYDERABAD",
"MADURAI" };
static int itemsChecked;
static EditText selectDestination;
@Override
protected void onCreate(Bundle savedInstanceState) {
super.onCreate(savedInstanceState);
setContentView(R.layout.activity_main);
selectDestination = (EditText) findViewById(R.id.txtDestination);
Button buttonShowDialog = (Button) findViewById(R.id.btnDestination);
buttonShowDialog.setOnClickListener(new OnClickListener() {
@Override
public void onClick(View v) {
showDialog();
}
});
}
/**
* Creates a new instance of our dialog and displays it.
*/
private void showDialog() {
DialogFragment newFragment = ChoiceDialogFragment.newInstance();
newFragment.show(getFragmentManager(), "dialog");
}
/**
* Dialog class that contains a custom view, while keeping standard dialog
* elements such as the title and positive/negative buttons.
*/
public static class ChoiceDialogFragment extends DialogFragment {
TextView tv;
public static ChoiceDialogFragment newInstance() {
ChoiceDialogFragment frag = newChoiceDialogFragment();
return frag;
}
@Override
public Dialog onCreateDialog(Bundle savedInstanceState) {
AlertDialog.Builder alertDialogBuilder = new AlertDialog.Builder(
getActivity());
View view = getActivity().getLayoutInflater().inflate(
R.layout.choice_dialog_fragment, null);
tv = (TextView) view.findViewById(R.id.textView1);
alertDialogBuilder.setView(view);
alertDialogBuilder.setIcon(R.drawable.ic_launcher);
alertDialogBuilder.setTitle(getString(R.string.dialog_title));
alertDialogBuilder.setPositiveButton(
getString(R.string.dialog_positive_text),
newDialogInterface.OnClickListener() {
@Override
public voidonClick(DialogInterface dialog, int which) {
Toast.makeText(
getActivity(),
getString(R.string.dialog_positive_toast_message),
Toast.LENGTH_SHORT).show();
dialog.dismiss();
}
});
alertDialogBuilder.setNegativeButton(
getString(R.string.dialog_negative_text),
newDialogInterface.OnClickListener() {
@Override
public voidonClick(DialogInterface dialog, int which) {
Toast.makeText(
getActivity(),
getString(R.string.dialog_negative_toast_message),
Toast.LENGTH_SHORT).show();
dialog.cancel();
}
});
alertDialogBuilder.setSingleChoiceItems(items, itemsChecked,
newDialogInterface.OnClickListener() {
@Override
public voidonClick(DialogInterface arg0, int which) {
tv.setText(items[which]);
selectDestination.setText(items[which].toString());
}
}).create();
returnalertDialogBuilder.create();
}
}
}
6.No need to modify Androidmanifest.xml
7.Run the application in the emulator.
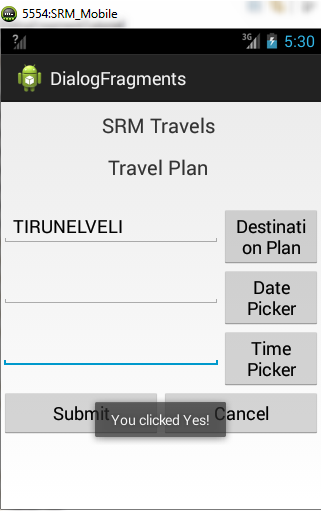
Figure 1 Shows Activity screen. Figure 2 Shows The Dialog Fragment floating over the Activity when button is clicked.
Figure 3 Shows The Dialog Fragment return selected choice item to Activity.


CODE EXPLANATION Running the project should show a simple screen with a button centered on it,with a textview waiting to display selected choice item from DialogFragment. Clicking that button opens up our dialog.The standard elements to all dialogs such as a title and positive/negative buttons and multiple choice items using your phone’s default UI scheme are added to the AlertDialog.Through fragment layout custom content are included into the Dialog Fragment in our case a textview to display information about the choice item is added.The design pattern for Dialog Fragment code is designed to be useful if later on if you need to add arguments to your DialogFragment instantiation.DialogFragment newFragment = ChoiceDialogFragment.newInstance();
           newFragment.show(getFragmentManager(), "dialog");

          ............
                 DialogFragment sets up UI in two ways . if your dialog most aspects need to be customized, you can use the onCreateView(...) method .Generally most Fragments do their UI setup here only.
However, if you need a fairly standard AlertDialog with just a small tweak to it (like our example we have added only a textView to display as a part of custom addition to standard elements of Alert Dialog such as  multi choice items,negative positive buttons.), there is another method that you can see we are using – onCreateDialog(...). This allows you to build your AlertDialog and let the system handle the view creation.
Most of the code in here is just setting up our AlertDialog.Builder.
public Dialog onCreateDialog(Bundle savedInstanceState) {
AlertDialog.Builder alertDialogBuilder = new AlertDialog.Builder(
getActivity());
View view = getActivity().getLayoutInflater().inflate(
R.layout.choice_dialog_fragment, null);
tv = (TextView) view.findViewById(R.id.textView1);
alertDialogBuilder.setView(view);
                                              ............
 inflating our custom view from the layout file fragment_example_dialog.xml and setting our inflated view as the custom view for our dialog.
tv.setText("You have selected " + items[which]);
The above code in ChoiceDialogFragment sets up value of selected item content in to the custom view in Fragment. selectDestination.setText(items[which].toString());
The Above code in MainActivity gets the value selected from Single choice element from Dialog and displays in its EditText of the Activity.Similarly TimePicker and DatePicker Dialog Fragments can be added to this project to complete the Application.


