Android Animation Tutorial - Hallo sahabat Google Android Developer Tutorial, Pada Artikel yang anda baca kali ini dengan judul Android Animation Tutorial, kami telah mempersiapkan artikel ini dengan baik untuk anda baca dan ambil informasi didalamnya. mudah-mudahan isi postingan
Artikel Android animation tutorial,
Artikel Android Tweened animation, yang kami tulis ini dapat anda pahami. baiklah, selamat membaca.
Judul : Android Animation Tutorial
link : Android Animation Tutorial
The filename will be used as the resource ID.Animation Types
Combining Animation Types
Playing a Sequence of Animations

Anda sekarang membaca artikel Android Animation Tutorial dengan alamat link https://googleandroiddevelopertutorial.blogspot.com/2014/01/android-animation-tutorial.html
Judul : Android Animation Tutorial
link : Android Animation Tutorial
Android Animation Tutorial
Android animation tutorial

There are three types of animation mechanisms in Android . The View Animation is simple and can handle many common requirements.
The View Animation system is the simplest of the three mechanisms. It lets you define properties of your Views that should be animated using a technique called tween animation. You implement the animation by specifying transformations on your View at the start and at the end of the animation. This can be done in XML resource files or programmatically. The downside of this mechanism is that it can only be applied to Views.
The Property Animation system is much more powerful that the View Animation system. It lets you animate essentially anything. The animations are highly customizable, you can specify the duration, the type of interpolation, the number of repeats and even (within limits) the frame rate of the animation. The Property Animation system should be your first choice for more complex animations.Android 3.0 introduced the Properties Animation API which allow to change object properties over a predefined time interval.The API allows to define for arbitrary object properties a start and end value and apply a time-based change to this attribute. This API can be applied on any Java object not only on
Views.The Drawable Animation gives you the most freedom in the sense that you can specify every single frame of the animation as a separate Drawable resource. It is akin to the more traditional animation in which images are shown one after another in quick succession. The downside of this approach is that every frame has to be specified separately. This can and up to be very tedious and time consuming.
Tween animationAn animation defined in XML that performs transitions such as rotating, fading, moving, and stretching on a graphic.
FILE LOCATION:
res/anim/filename.xmlThe filename will be used as the resource ID.
COMPILED RESOURCE DATATYPE:
Resource pointer to an
Animation.RESOURCE REFERENCE:
In Java:
In XML:
R.anim.filenameIn XML:
@[package:]anim/filenameThe file must have a single root element: either an
<alpha>, <scale>, <translate>, <rotate>, or <set>element that holds a group (or groups) of other animation elements (even nested <set> elements).Animation listeners
If you want to listen to animation events like start, end and repeat, your activity should implements AnimationListener. This step is optional. If you implement AnimationListener you will have to override following methods.
onAnimationStart – This will be triggered once the animation startedonAnimationEnd – This will be triggered once the animation is overonAnimationRepeat – This will be triggered if the animation repeats
Important XML animation attributes
When working with animations it is better to have through knowledge about some of the important XML attributes which create major differentiation in animation behavior. Following are the important attributes you must known about.
android:duration – Duration of the animation in which the animation should complete
android:startOffset – It is the waiting time before an animation starts. This property is mainly used to perform multiple animations in a sequential manner
android:interpolator – It is the rate of change in animation
android:fillAfter – This defines whether to apply the animation transformation after the animation completes or not. If it sets to false the element changes to its previous state after the animation. This attribute should be use with <set> node
android:repeatMode – This is useful when you want your animation to be repeat
android:repeatCount – This defines number of repetitions on animation. If you set this value to infinite then animation will repeat infinite times.
Following are the few animation schemes
1.Fade In 2.Fade Out 3. Cross Fading4. Blink5. Zoom In 6.Zoom Out 7.Rotate 8.Move 9.Slide Up 10.Slide Down 11.Bounce 12.Sequential Animation 13.Together Animation
Animation Types
Fade In
For fade in animation you can use <alpha> tag which defines alpha value. Fade in animation is nothing but increasing alpha value from 0 to 1.
For fade in animation you can use <alpha> tag which defines alpha value. Fade in animation is nothing but increasing alpha value from 0 to 1.
fade_in.xml
<?xml version="1.0" encoding="utf-8"?>
<set xmlns:android="http://schemas.android.com/apk/res/android"
android:fillAfter="true">
<alpha
android:duration="1000"
android:fromAlpha="0.0"
android:interpolator="@android:anim/accelerate_interpolator"
android:toAlpha="1.0"/>
</set>
Fade_out
Fade out is exactly opposite to fade in, where we need to decrease the alpha value from 1 to 0fade_out.xml
<?xml version="1.0" encoding="utf-8"?>
<set xmlns:android="http://schemas.android.com/apk/res/android"
android:fillAfter="true">
<alpha
android:duration="1000"
android:fromAlpha="1.0"
android:interpolator="@android:anim/accelerate_interpolator"
android:toAlpha="0.0"/>
</set>
Blink
Blink animation is animating fade out or fade in animation in repetitive fashion.
For this you will have to set android:repeatCount="infinite" attributes.
blink.xml
<?xml version="1.0" encoding="utf-8"?>
<set xmlns:android="http://schemas.android.com/apk/res/android">
<alpha
android:duration="600"
android:fromAlpha="0.0"
android:interpolator="@android:anim/accelerate_interpolator"
android:repeatCount="infinite"
android:repeatMode="reverse"
android:toAlpha="1.0"/>
</set>
Zoom_In
For zoom use <scale> tag. Use piviotX=50% and piviotY=50% to perform zoom from the center of the element. Also you need to use ,fromXScale, fromYScale attributes which defines scaling of the object. Keep these value lesser than toXScale, toYScale.This will set the pivot point to the centre of the animated view. Note how the pivot point coordinates are specified in percent. There are three different ways to specify the pivot point.
When specifying the absolute value of the pivot you may not use units, such as
50% is the centre of the animated view (relative to view).50%p is the centre of the view’s parent (relative to parent).50 is 50 pixels from the top/left of the animated view (absolute).When specifying the absolute value of the pivot you may not use units, such as
dp, sp, ptor mm. If you want to use those units then you have to specify the pivot programmatically.zoom_in.xml
<?xml version="1.0" encoding="utf-8"?>
<set xmlns:android="http://schemas.android.com/apk/res/android"
android:fillAfter="true">
<scale
xmlns:android="http://schemas.android.com/apk/res/android"
android:duration="1000"
android:fromXScale="1"
android:fromYScale="1"
android:pivotX="50%"
android:pivotY="50%"
android:toXScale="3"
android:toYScale="3">
</scale>
</set>
Zoom_out
Zoom out animation is same as zoom in but toXScale, toYScale values are lesser thanfromXScale, fromYScale
zoom_out.xml
<?xml version="1.0" encoding="utf-8"?>
<set xmlns:android="http://schemas.android.com/apk/res/android"
android:fillAfter="true">
<scale
xmlns:android="http://schemas.android.com/apk/res/android"
android:duration="1000"
android:fromXScale="1.0"
android:fromYScale="1.0"
android:pivotX="50%"
android:pivotY="50%"
android:toXScale="0.5"
android:toYScale="0.5">
</scale>
</set>
Rotate
The rotate element lets you rotate a view around a pivot point. The rotation is in the plane of the screen only. The View Animation system does not allow 3d rotations. These can only be done using the Property Animation system.The values of fromDegrees and toDegrees specify the rotation angle at the start and end of the animation. The specifications say that you can specify the angle as a floating point number. In most cases,however, the angles you specify here will be integers.
The pivotX and pivotY attributes specify the centre of the rotation. You can specify the values exaclty in the same way as the pivotX and pivotY of the scale animation.
rotate.xml
<?xml version="1.0" encoding="utf-8"?>
<set xmlns:android="http://schemas.android.com/apk/res/android">
<rotate
android:duration="600"
android:fromDegrees="0"
android:interpolator="@android:anim/cycle_interpolator"
android:pivotX="50%"
android:pivotY="50%"
android:repeatCount="infinite"
android:repeatMode="restart"
android:toDegrees="360"/>
</set>
Move
In order to change position of object use <translate> tag. The values
fromXDelta and fromYDelta specify the position of the view at the start of the animation, whereas toXDelta and toYDelta specify the position of the view at the end of the animation.As with the pivot of the scale animation the start and end locations of the view can be specified in pixels, in percent of the width and height of the animated view by appending
% or in percent of the width and height of the parent view by appending %p. move.xml
<?xml version="1.0" encoding="utf-8"?>
<set
xmlns:android="http://schemas.android.com/apk/res/android"
android:fillAfter="true"
android:interpolator="@android:anim/linear_interpolator">
<translate
android:duration="800"
android:fromXDelta="0%p"
android:toXDelta="75%p"/>
</set>
Slide Up
Sliding animation uses <scale> tag only. Slide up can be achieved by setting android:fromYScale=”1.0″ and android:toYScale=”0.0″slide_up.xml<?xml version="1.0" encoding="utf-8"?>
<set
<scale
Slide Down
Slide down is exactly opposite to slide down animation. Just interchange android:fromYScale and android:toYScale values.
slide_down.xml
<?xml version="1.0" encoding="utf-8"?>
<set xmlns:android="http://schemas.android.com/apk/res/android"
android:fillAfter="true">
<scale
android:duration="500"
android:fromXScale="1.0"
android:fromYScale="0.0"
android:interpolator="@android:anim/linear_interpolator"
android:toXScale="1.0"
android:toYScale="1.0"/>
</set>
Bounce
Bounce is just an animation effect where animation ends in bouncing fashion. For this set android:interpolator value to @android:anim/bounce_interpolator. This bounce can be used with any kind animation. Following slide down example uses bounce effect.
bounce.xml
<?xml version="1.0" encoding="utf-8"?>
<set xmlns:android="http://schemas.android.com/apk/res/android"
android:fillAfter="true"
android:interpolator="@android:anim/bounce_interpolator">
<scale
android:duration="500"
android:fromXScale="1.0"
android:fromYScale="0.0"
android:toXScale="1.0"
android:toYScale="1.0"/>
</set>
Combining Animation Types
Each of the animation types above have good uses on their own but the real power of animations lies in combining multiple animations into one. The
set XML element lets you create animations that are made from multiple effects, either simultaneously or one after the other. The set element allows to combine the other animation types into groups. Let’s have a look at an example.This animation combines an alpha, a rotate and a scale animation into a single animation. The combined animation makes the view rotate, scale down to a point and fade out at the same time.Note that we have specified the interpolator of the animation set and also set the shareInterpolator attribute to true. This means that all the elements that are inside the animation set use the same interpolator. It is also possible to specify the interpolator of each individual animation within the set separately.<?xml version="1.0" encoding="utf-8"?>
<set xmlns:android="http://schemas.android.com/apk/res/android"
android:duration="1000"
android:fillAfter="false"
android:interpolator="@android:anim/accelerate_interpolator"
android:shareInterpolator="true">
<alpha
android:fromAlpha="1.0"
android:toAlpha="0.0"/>
<rotate
android:fromDegrees="0"
android:pivotX="50%"
android:pivotY="50%"
android:toDegrees="360"/>
<scale
android:fillAfter="true"
android:fromXScale="1.0"
android:fromYScale="1.0"
android:pivotX="50%"
android:pivotY="50%"
android:toXScale="0.0"
android:toYScale="0.0"/>
</set>
Playing a Sequence of Animations
We can also combine animations to produce a sequence of different effects. Maybe we want to first scale vertically and then horizontally. The following XML code uses the
startOffset attribute and does exactly that.The startOffset attribute specifies after which time, from the start of the complete animation, the specific animation should be played. <?xml version="1.0"encoding="utf-8"?>
<set xmlns:android="http://schemas.android.com/apk/res/android"
android:interpolator="@android:anim/linear_interpolator" >
<rotate
android:duration="1000"
android:fromDegrees="0"
android:interpolator="@android:anim/cycle_interpolator"
android:pivotX="50%"
android:pivotY="50%"
android:repeatCount="2"
android:repeatMode="restart"
android:startOffset="100"
android:toDegrees="360" />
<translate
android:duration="1000"
android:fillAfter="true"
android:fromXDelta="0%p"
android:startOffset="1100"
android:toXDelta="75%p" />
<translate
android:duration="1000"
android:fillAfter="true"
android:fromYDelta="0%p"
android:startOffset="2100"
android:toYDelta="70%p" />
<translate
android:duration="1000"
android:fillAfter="true"
android:fromXDelta="0%p"
android:startOffset="3100"
android:toXDelta="-75%p" />
<translate
android:duration="1000"
android:fillAfter="true"
android:fromYDelta="0%p"
android:startOffset="4100"
android:toYDelta="-70%p" />
<scale
xmlns:android="http://schemas.android.com/apk/res/android"
android:duration="1000"
android:fromXScale="1"
android:fromYScale="1"
android:pivotX="50%"
android:pivotY="50%"
android:startOffset="5100"
android:toXScale="2"
android:toYScale="2" >
</scale>
<scale
xmlns:android="http://schemas.android.com/apk/res/android"
android:duration="1000"
android:fromXScale="1.0"
android:fromYScale="1.0"
android:pivotX="50%"
android:pivotY="50%"
android:startOffset="6100"
android:toXScale="0.5"
android:toYScale="0.5" >
</scale>
<alpha
android:duration="1000"
android:fromAlpha="1.0"
android:interpolator="@android:anim/accelerate_interpolator"
android:startOffset="7100"
android:toAlpha="0.1" />
</set>
In the example above the first rotate animation the duration has been set to 1000ms with inital offset of 100ms. After the first rotate animation has finished we want to start the second animation translate. This second animation should, therefore, have a startOffset of 2100.Rotate animation would have consumed 2100 ms since repeat count is one two times rotation will happen. Translate also plays for 1000ms after which the next animation starts.you need to claculate and appened the startOffset timing accordingly.There are several things to note about the example above. First of all, when playing animations in sequence, you should always set
shareInterpolator to false and not set a duration in the surrounding animation set. Instead you should specify each interpolator and duration separately. The View Animation system will automatically figure out the total duration of the animation for you.ViewFlipper
A ViewFlipper is a simpleViewAnimator that will animate between two or more views that have been added to it. Only one child is shown at a time. If requested, can automatically flip between each child at a regular interval.A ViewFlipper can be used to slide views in and out of the user’s current view port .These Views slides with given appropriate Animation.
1.Create Android project with details as listed in the table below.Property name | Property value |
Project name | SRM_AndroidAnimationTutorial |
Package name | in.ac.srmuniv.animation |
Activity name | MainActivity |
Layout xml name | main |
2.Copy the code to the file main.xml in res/layout folder
<?xml version="1.0"encoding="utf-8"?>
<LinearLayout xmlns:android="http://schemas.android.com/apk/res/android"
android:layout_width="fill_parent"
android:layout_height="fill_parent"
android:orientation="vertical" >
<TextView
android:layout_width="fill_parent"
android:layout_height="wrap_content"
android:layout_marginTop="10dp"
android:gravity="center"
android:text="SRM University Photos"
android:textColor="#000099"
android:textSize="20dp" />
<ViewFlipper
android:id="@+id/view_flipper"
android:layout_width="fill_parent"
android:layout_height="fill_parent"
android:layout_margin="6dip" >
<!-- The child Views/Layout to flip -->
<!-- Layout 1 for 1st Screen -->
<LinearLayout
android:layout_width="fill_parent"
android:layout_height="fill_parent"
android:gravity="center"
android:orientation="vertical" >
<TextView
android:id="@+id/txtView1"
android:layout_width="wrap_content"
android:layout_height="wrap_content"
android:layout_marginTop="15dp"
android:text="SRM HOTEL"
android:textColor="#191975"
android:textSize="25dp"
android:textStyle="bold">
</TextView>
<ImageView
android:id="@+id/imageView1"
android:layout_width="450dp"
android:layout_height="450dp"
android:layout_marginTop="15dp"
android:src="@drawable/srmimage1" />
</LinearLayout>
<!-- Layout 2 for 2nd Screen -->
<LinearLayout
android:layout_width="fill_parent"
android:layout_height="fill_parent"
android:gravity="center"
android:orientation="vertical" >
<TextView
android:id="@+id/txtView2"
android:layout_width="wrap_content"
android:layout_height="wrap_content"
android:layout_marginTop="15dp"
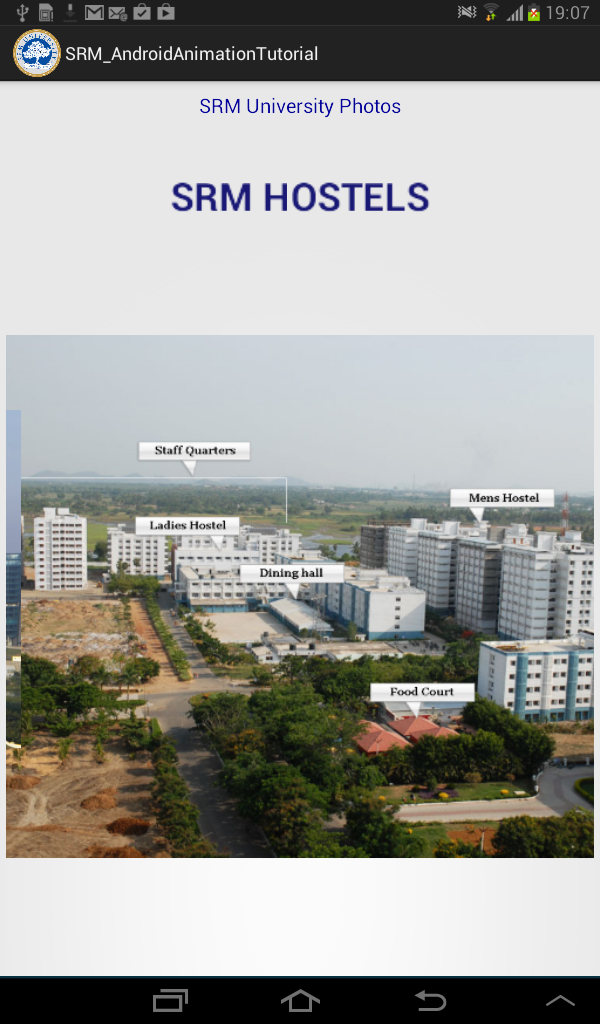
android:text="SRM HOSTELS"
android:textColor="#191975"
android:textSize="25dp"
android:textStyle="bold">
</TextView>
<ImageView
android:id="@+id/imageView2"
android:layout_width="450dp"
android:layout_height="450dp"
android:layout_marginTop="15dp"
android:src="@drawable/srmimage2" />
</LinearLayout>
<!-- Layout 3 for 3rd Screen -->
<LinearLayout
android:layout_width="fill_parent"
android:layout_height="fill_parent"
android:gravity="center"
android:orientation="vertical" >
<TextView
android:id="@+id/txtView3"
android:layout_width="wrap_content"
android:layout_height="wrap_content"
android:layout_marginTop="15dp"
android:text="TECH-PARK BUILDING"
android:textColor="#191975"
android:textSize="25dp"
android:textStyle="bold">
</TextView>
<ImageView
android:id="@+id/imageView3"
android:layout_width="450dp"
android:layout_height="450dp"
android:layout_marginTop="15dp"
android:src="@drawable/srmimage3" />
</LinearLayout>
</ViewFlipper>
</LinearLayout>
3.Create anim folder in res add the following xml files
a) animation.xml
<?xml version="1.0"encoding="utf-8"?>
<set xmlns:android="http://schemas.android.com/apk/res/android"
android:interpolator="@android:anim/linear_interpolator" >
<rotate
android:duration="1000"
android:fromDegrees="0"
android:interpolator="@android:anim/cycle_interpolator"
android:pivotX="50%"
android:pivotY="50%"
android:repeatCount="1"
android:repeatMode="restart"
android:startOffset="100"
android:toDegrees="360" />
<translate
android:duration="1000"
android:fillAfter="true"
android:fromXDelta="0%p"
android:startOffset="2100"
android:toXDelta="75%p" />
<translate
android:duration="1000"
android:fillAfter="true"
android:fromYDelta="0%p"
android:startOffset="3100"
android:toYDelta="70%p" />
<translate
android:duration="1000"
android:fillAfter="true"
android:fromXDelta="0%p"
android:startOffset="4100"
android:toXDelta="-75%p" />
<translate
android:duration="1000"
android:fillAfter="true"
android:fromYDelta="0%p"
android:startOffset="5100"
android:toYDelta="-70%p" />
<scale
xmlns:android="http://schemas.android.com/apk/res/android"
android:duration="1000"
android:fromXScale="1"
android:fromYScale="1"
android:pivotX="50%"
android:pivotY="50%"
android:startOffset="6100"
android:toXScale="2"
android:toYScale="2" >
</scale>
<scale
xmlns:android="http://schemas.android.com/apk/res/android"
android:duration="1000"
android:fromXScale="1.0"
android:fromYScale="1.0"
android:pivotX="50%"
android:pivotY="50%"
android:startOffset="7100"
android:toXScale="0.5"
android:toYScale="0.5" >
</scale>
<alpha
android:duration="1000"
android:fromAlpha="1.0"
android:interpolator="@android:anim/accelerate_interpolator"
android:startOffset="8100"
android:toAlpha="0.1" />
</set>
b.in_from_left.xml
<set xmlns:android="http://schemas.android.com/apk/res/android"
android:shareInterpolator="false">
<translate
android:fromXDelta="-100%" android:toXDelta="0%"
android:fromYDelta="0%" android:toYDelta="0%"
android:duration="1000" />
</set>
c.in_to_right.xml
<set xmlns:android="http://schemas.android.com/apk/res/android"
android:shareInterpolator="false">
<translate
android:fromXDelta="0%" android:toXDelta="-100%"
android:fromYDelta="0%" android:toYDelta="0%"
android:duration="1000" />
</set>
d.out_to_left.xml
<set xmlns:android="http://schemas.android.com/apk/res/android"
android:shareInterpolator="false">
<translate
android:fromXDelta="0%" android:toXDelta="100%"
android:fromYDelta="0%" android:toYDelta="0%"
android:duration="1000" />
</set>
e.out_from_right.xml
<set xmlns:android="http://schemas.android.com/apk/res/android"
android:shareInterpolator="false">
<translate
android:fromXDelta="-100%" android:toXDelta="0%"
android:fromYDelta="0%" android:toYDelta="0%"
android:duration="1000" />
</set>
4.Copy the code in MainActivity.java. Activity.
packagein.ac.srmuniv.animation;
importin.ac.srmuniv.animation.R;
importandroid.app.Activity;
import android.os.Bundle;
import android.util.Log;
importandroid.view.MotionEvent;
import android.view.View;
importandroid.view.animation.Animation;
importandroid.view.animation.Animation.AnimationListener;
importandroid.view.animation.AnimationUtils;
importandroid.widget.TextView;
import android.widget.Toast;
importandroid.widget.ViewFlipper;
public class MainActivity extends Activity implements AnimationListener {
private ViewFlipper viewFlipper;
TextView txtView;
TextView txtView1;
TextView txtView2;
private Animation animSequence;
private float lastX;
@Override
protected void onCreate(Bundle savedInstanceState) {
super.onCreate(savedInstanceState);
setContentView(R.layout.main);
viewFlipper = (ViewFlipper) findViewById(R.id.view_flipper);
txtView = (TextView) findViewById(R.id.txtView1);
animSequence = AnimationUtils.loadAnimation(this, R.anim.animation);
animSequence.setAnimationListener(this);
}
// Method to handle touch event like left to right swap and right to left
// swap
public booleanonTouchEvent(MotionEvent touchevent) {
switch(touchevent.getAction()) {
// when user first touches the screen to swap
case MotionEvent.ACTION_DOWN: {
lastX = touchevent.getX();
break;
}
case MotionEvent.ACTION_UP: {
float currentX = touchevent.getX();
// if left to right swipe on screen
if (lastX < currentX) {
// If no more View/Child to flip
if (viewFlipper.getDisplayedChild() == 0)
break;
// set the required Animation type to ViewFlipper
// The Next screen will come in form Left and current Screen
// will go OUT from Right
viewFlipper.setInAnimation(this, R.anim.in_from_left);
viewFlipper.setOutAnimation(this, R.anim.out_to_right);
// Show the next Screen
// viewFlipper.getChildAt(viewFlipper.getDisplayedChild()).startAnimation(animFadeIn);
viewFlipper.showNext();
View v = viewFlipper
.getChildAt(viewFlipper.getDisplayedChild());
v.startAnimation(animSequence);
}
// if right to left swipe on screen
if (lastX > currentX) {
if (viewFlipper.getDisplayedChild() == 1)
break;
// set the required Animation type to ViewFlipper
// The Next screen will come in form Right and current Screen
// will go OUT from Left
viewFlipper.setInAnimation(this, R.anim.in_from_right);
viewFlipper.setOutAnimation(this, R.anim.out_to_left);
// Show The Previous Screen
viewFlipper.showPrevious();
viewFlipper.getChildAt(viewFlipper.getDisplayedChild())
.startAnimation(animSequence);
}
break;
}
}
return false;
}
@Override
public voidonAnimationEnd(Animation arg0) {
Toast.makeText(getApplicationContext(), "Animation Stopped",
Toast.LENGTH_LONG).show();
}
@Override
public voidonAnimationRepeat(Animation animation) {
Toast.makeText(getApplicationContext(), "Animation Repeated",
Toast.LENGTH_SHORT).show();
}
@Override
public voidonAnimationStart(Animation animation) {
Toast.makeText(getApplicationContext(), "Animation Started",
Toast.LENGTH_SHORT).show();
}
}
5.No need to modify Androidmanifest.xml
6.Run the application in the emulator/device.


Figure 1 Shows rotate animation Figure 2 Shows translate animation
Figure 3 Shows scale animation Figure 4 Shows fade animation
CODE EXPLANATION
              In this Application we can see main.xml,the layout for MainActivity

 containing ViewFlipper which itself is a containter consisting of three child

elements.In the anim folder four xml translate animation files are needed to perform

image translation.The first child element of viewflipper is displayed,

When the user swipes the screen

 boolean onTouchEvent(MotionEvent touchevent) is called ACTION_DOWN

 recognizes when user first touches the screen to swipe and ACTION_UP

is called when user releases the swipe.The lastX and currentX coordinates

are calculated to decide wheather swipe is from left to right or right to left.

If lastX < currentX then following code sets the required Animation type

 to ViewFlipper to translate.The Next screen will come in form Left and

current Screen will go OUT from Right.
      viewFlipper.setInAnimation(this, R.anim.in_from_left);

       viewFlipper.setOutAnimation(this, R.anim.out_to_right);


      viewFlipper.showNext();


will Show the next Screen simlarly lastX > currentX The Next screen will come in form Right and current Screen will go OUT from Left.


          viewFlipper.setInAnimation(this, R.anim.in_from_right);


          viewFlipper.setOutAnimation(this, R.anim.out_to_left);


          viewFlipper.showPrevious();

will show the Previous Screen.

 The selected child view of viewflipper is identified and the view is set for animation which include rotation with repeat for one more time translation for four times ,zoom in and zoom out then finally followed by fade effect.


                                 View v = viewFlipper  getChildAt(viewFlipper.getDisplayedChild());


                                  v.startAnimation(animSequence);
Demikianlah Artikel Android Animation Tutorial
Sekianlah artikel Android Animation Tutorial kali ini, mudah-mudahan bisa memberi manfaat untuk anda semua. baiklah, sampai jumpa di postingan artikel lainnya.
Anda sekarang membaca artikel Android Animation Tutorial dengan alamat link https://googleandroiddevelopertutorial.blogspot.com/2014/01/android-animation-tutorial.html
Android Animation Tutorial
4/
5
Oleh
Unknown


